Fish Tank Fire in Staunton Apartment
Staunton firefighters extinguished a blaze that began in--of all places--an aquarium.
Fish tank wire behind fire.
An electrical short inside a 55-gallon fish tank in an Algonquin home Thursday ignited a fire, causing major damage, killing numerous fish and a kitten, which died of smoke inhalation, authorities said.
Fish Tank Pump causes fire.
Investigators found a fire in the basement and extinguished it without incident, Bradbury said, adding that there was smoke damage throughout the house. She estimated the cost of the damage at about $50,000. Bradbury said the fire was caused by an overheated pump motor on a fish tank in the basement. |
These are the stories that happen to someone else, right? Nothing could be farther from the truth. Hundreds of home fires happen every day in the US and they don't only happen to careless people. Aquarists, just by the nature of the beast, are at a higher risk of having a fire in their home. We are dealing with water and electricity, two components that when mixed together in the right situation can cause bodily injury, destroy your home and kill your family and pets.
So, how can we make our hobby safer? By following a few simple guidelines can mean the difference of life and death.
Go Buy a GFCI
What is a GFCI?
We have all heard the term GFCI (or GFIs). For some of us, the term is as broad as our understanding goes. A GFCI, or ground-fault circuit interrupter, is a device that adds a greater level of safety by reducing the risk of electric shock. Most building codes now require that a GFCI outlet be used in wet locations such as bathrooms, kitchens, laundry rooms and outdoors. But, electricians don't plan on the home owners having a large body of water in the middle of their living rooms, so many rooms besides the above mentioned, do not have GFCIs installed.
How do you know if you have a GFCI installed?
Visually GFCIs are easy to recognize. When you look at a normal 120-volt outlet in the United States, there are two vertical slots and then a round hole centered below them. The left slot is slightly larger than the right. The left slot is called "neutral," the right slot is called "hot" and the hole below them is called "ground." If a piece of equipment is working properly, all electricity that the equipment uses will flow from hot to neutral.
A GFCI outlet will have the two vertical slots and then a rounded hole in the center, but it will also have two other "buttons" that a standard outlet will not have; the TEST and RESET button. These are the components that monitor the amount of current flowing from hot to neutral. If there is any imbalance, it will trip the circuit. It is able to sense a mismatch as small as 4 or 5 milliamps, and it can react as quickly as one-thirtieth of a second.
A GFCI outlet may be wired in a branch circuit, which means other outlets and electrical devices may share the same circuit and breaker (or fuse). When a properly wired GFCI trips, the other devices down the line from it will also lose power. Note that devices on the circuit that come before the GFCI are not protected and are not affected when the GFCI is tripped. If the GFCI outlet is improperly wired, none of the other loads, upstream nor downstream, are protected.
If you have an outlet that doesn't work, and the breaker is not tripped, look for a GFCI outlet which may have tripped. The non-working outlet may be down line from a GFCI outlet. Note that the affected outlets may not be located near the GFCI outlet, they may be several rooms away or even on a different floor.
A GFCI outlet has a "Test" and a "Reset" button. Pressing the "Test" button will trip the outlet and break the circuit. Pressing the "Reset" will restore the circuit. If pressing the test button does not work, then replace the GFCI outlet. If the outlet pops when you press the "Test" button, but the outlet still has power, the outlet is miswired. A miswired outlet is dangerous and it should be replaced immediately.
You don't have a GFCI installed: what now?
Installing a GFCI is easy with some basic knowledge and the ability to adhere precisely to instructions. However, if the thought of dealing with electricity makes you nervous, hire an electrician for the install. Now is not the time to start counting nickels and dimes. It can save your life, the life of your family and pets and all the possessions you worked so hard to obtain. So, if you do not feel comfortable installing a GFCI, spend the money to have it "placed" professionally.
If you are brave and apt enough to install it yourself, here are the directions for doing so. These instructions were made to be followed precisely. Do not adapt them to suit your situation unless you honestly know what you are doing. Always remember to TURN OFF THE BREAKER before doing any electrical work.
Your tank is already up and is blocking the outlet?
In some (most) situations, your tank will have already been setup before this safety evaluation is done. The outlet may or may not be accessible at this point. If you can "get at" the outlet, by all means install the outlet type according the instructions above. If the area is not accessible, all is not lost, for a Portable GFCI Plug or a 6-prong GFCI gang can be installed. There has been some discussion that temporary GFCIs and the gangs adapters trip more often than a permanently installed one.
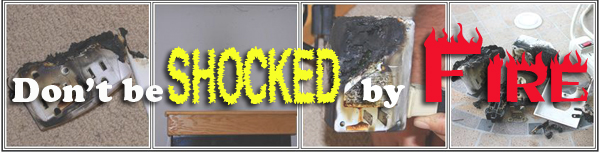
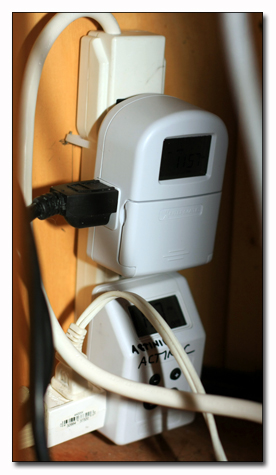
Protecting Your Outlet from Water
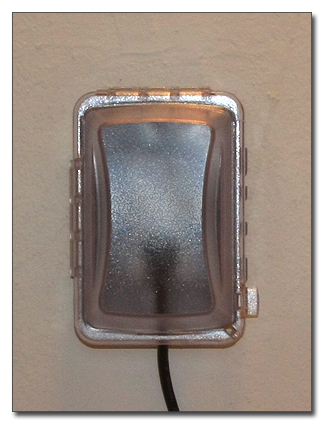
Our tanks are areas of high humidity. Even if water is not blatantly dripping onto the outlets, over time, enough moisture can build up to find it's way down wires or other surfaces. Sometimes equipment is moved or bumped during maintenance creating a pathway for mist or salt creep. Installing an In-Use Receptacle Cover will quickly and easily prevent water from getting into your outlet. In order for these to work the tank must be far enough from the wall for the lid to be able to left to access the receptacles within. If this is an afterthought saftey facelift, and there is no room to install a hard cover, draping plastic over the outlet will serve its purpose well.
Don't Overload your Outlets!
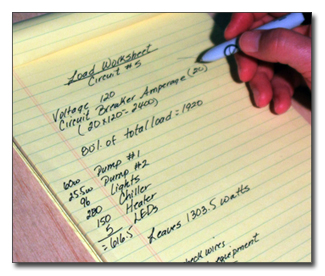
We've all seen some crazy setups over the years on how ingenious people can be when attempting to supply power to the many pieces of equipment a tank can have. Single duplex outlets with 2 receptacles have been seen with 6 receptacle adapters plus several power bars plugged in daisy chain fashion. We all know there is a limit to the amount of electricity that can be supplied through a single outlet. But do you have any idea what that limit is? Is your testing method to just continue to plug things until the breaker pops? There's actually a very easy way to figure out what each outlet can handle. Actually, the amount of electricity an outlet can supply is shared amongst all outlets included on a single circuit. A single circuit typically supplies 15 - 20 amps of power. How you determine this can be seen in the later discussion "Getting to Know Your Breaker Box". So, if a single circuit is 20 amps and we are dealing with your typical 120 volt system, the circuit can supply you with 2400 watts.
20 amps X 120 volt = 2400 watts.
But we all know math is never as easy as that. You can't just go around calculating watts of the equipment/appliances plugged in to a single circuit and keep plugging away until you hit 2400. You have to take into consideration the "surge" some equipment may have when they start up... metal halides, chillers are good examples. Never use more than 80% of the total capacity and remember the 2400 is shared number among all the outlets included on that circuit. Again, see the Getting to Know Your Breaker Box" for more information.
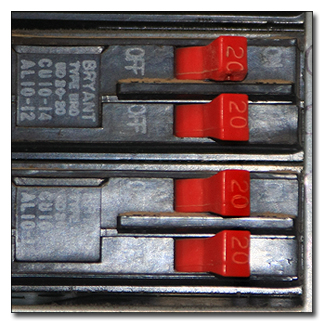
Getting to Know your Breaker Box
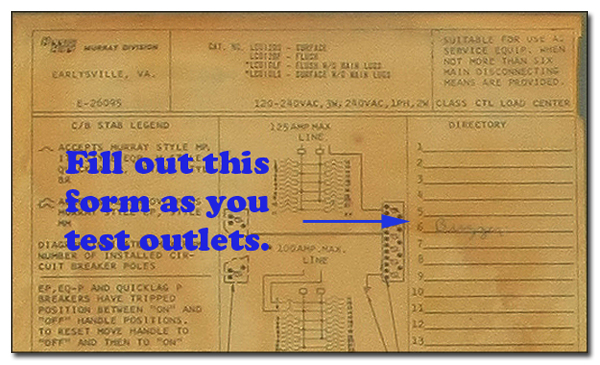
Where is your breaker box located? How many of you paused before answering? It's funny how every single establishment has one, yet most people know nothing about them. The most common piece of information known about them is that you don't want to go into the basement in a scary movie to flip them back on...... When you open up the box you should find some clearly numbered switches with a nice corresponding list on the door. Unfortunately this is not always the case and you may find the switches unnumbered and the numbered list incomplete or empty. Now is the time to fill it in by turning off a single switch and walking around testing outlets to see which ones were affected. You can test the outlets by either a volt detector or simply by walking around with an item like a night light. If it doesn't turn on, the outlet is attached to the switched circuit. As a safety note, it is always wise to not only switch the breaker off but to also test an outlet before working on it. It is easy to make a mistake and you may never get a second chance to learn that lesson. A single circuit is usually within a certain room, or runs along a wall or two within a room, but it is also important to note that sometimes outlets from different rooms can be on the same circuit. Make sure you systematically go through each outlet in each room. Once you have gathered the information, fill out the sheet on the breaker door.
On the end of the switches is here you will find your outlet "rating". Typically, you will see 15 or 20 but you may also have higher valued switches that say 40 or higher and are for such items as your washer and dryer and other high rated appliances. This is the number you plug into the equation above to calculate the total watts on a single circuit. This breaker box has 20amp circuits as indicated by the number 20 on the ends of the switches.
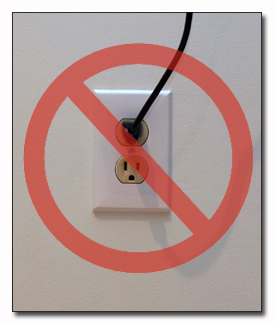
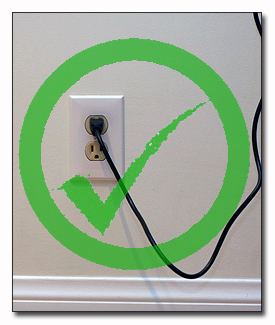
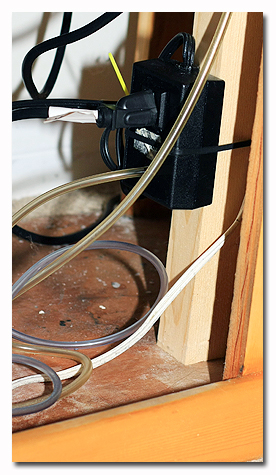
Here we go Loopty Loo.....
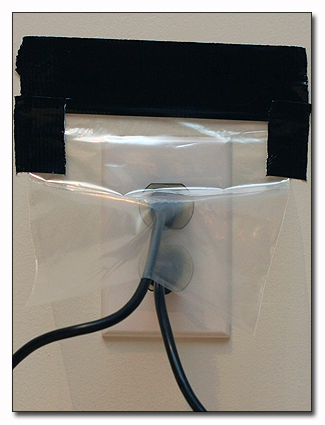
Water can accumulate and trickle down a cord directly into your electrical outlet. To avoid this, make sure that every cord hangs straight down below your outlet and forms a 'U' before running back up to the plug. Water will follow the cord and drip to the surface below instead of being led directly into the outlet. This arrangement is called a "drip loop".
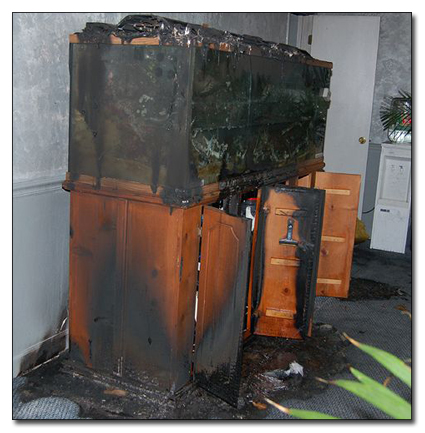
Finding Failing Equipment.
Sometimes a failing pump or heater can be the root cause of a fire. This can be a result of a product defect and can't really be avoided, but there are steps we can take to minimize the risk. Performing regularly scheduled maintenance on all our equipment as the manufacturer suggests will "cause" the "equipment" to run more smoothly. A well running piece of equipment reduces the energy required to run thus producing less heat. Lowering temps reduces failures cause by overheating. Handle equipment according to manufactures instructions, especially in regard to heaters. Pumps and heaters are a common cause of household fires involving aquariums. The tank shown above was a result of an equipment failure.
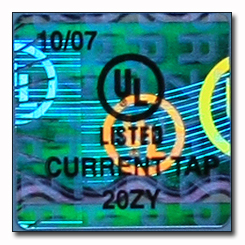
Select Safer Products.
Before purchasing a product ensure the it is UL listed. UL stands for "Underwriters Laboratory" which is an independent and non-profit organization that tests electrical components and equipment for potential hazards. When something is UL-listed, that means that the UL has tested the device, and it meets their requirements for safety - ie: fire or shock hazard. You are permitted to buy and install non-UL-listed devices and some popular high risk devices for our aquariums are non-UL-listed. Insurance policies sometimes have clauses in them that will limit their liability in case of a claim made in response to the failure of a non-UL-listed device. It's a lose-lose situation. You burn down your house because you buy a piece of equipment that was not put through safety testing and now your insurance won't cover your damages. Save yourself the headache, buy UL listed items only.
Clean it UP!
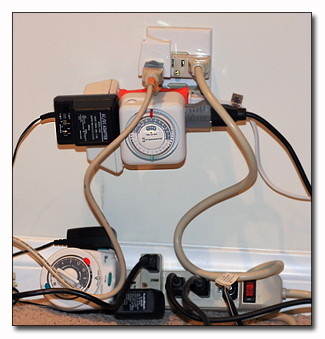
If you assess the area immediately around or under some hobbyists tanks, you will find power bars and wire connections sitting on the floor making them a perfect "catch all" for any misplaced water. Secure them off the bottom of a sump so in the event water pools underneath the plug connections won't be immersed in water. Whenever possible, secure the powe rbars to the side of the stand or the inside top of the stand. Organize you wirese so they are easily assessed and cleaned. Potential problems can be missed if you cannot decipher what anything is.
Pick a day and make it a weekly date with your tank. Look to make sure all your wires and connections are dry. Touch equipment to make sure they are not too hot to the touch. Assess what you have plugged into your outlets and get a running tally of Watts used as discussed earlier. Keeping a log can make this an easy task. When you add or remove a piece of equipment, add or subtract the Watts from your running total. With your weekly rounds, test the GFCI using the test and reset button to make sure it is functioning properly. Look for salt creep in inappropriate places.