SAFETY FIRST!
- REMOVE ALL DISTRACTIONS WHILE YOU WORK ON WIRING. KEEP CHILDREN AND PETS AWAY FROM THE AREA AND FOCUS ON THE TASK AT HAND.
- ACT AS THOUGH THE POWER IS ON EVEN WHEN YOU KNOW IT IS OFF.
- WEAR GYM SHOES OR OTHER SHOES WITH RUBBER SOLES.
- USE TOOLS MADE SPECIFICALLY FOR ELECTRICAL WORK. THESE TYPICALLY HAVE GENEROUS RUBBER GRIPS SO YOU NEVER NEED TO TOUCH METAL.
- REMOVE ANY JEWELRY, RINGS OR WATCHES.
- IF YOU ARE WORKING IN THE BASEMENT, STAND ON A WOODEN PLATFORM OR RUBBER MAT RATHER THAN THE CONCRETE FLOOR, ESPECIALLY IF IT IS WET.
|
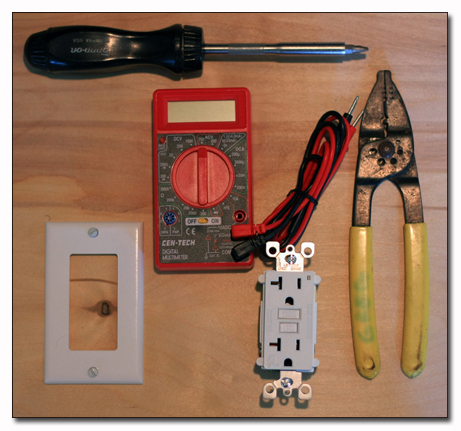
Tools Needed
- Screwdriver
- GFCI receptacle
- Wire cutters
- Volt Meter
- GFCI receptacle plate.
Step-By-Step Receptacle Replacement Instructions
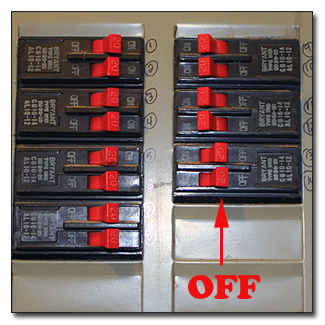
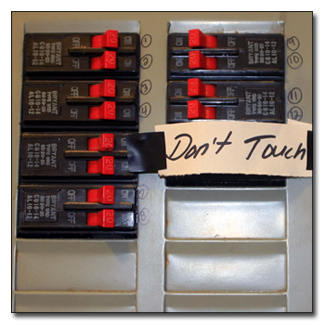
The first and most important step is to turn off the circuit that you will be working on. Find the correct breaker in the breaker box and flip it to the “Off” position. If you have a fuse box, find the right fuse and remove it completely from the panel. Mark it so another family member will not flip it back on while you are working on it.
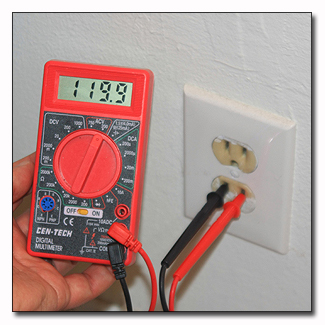
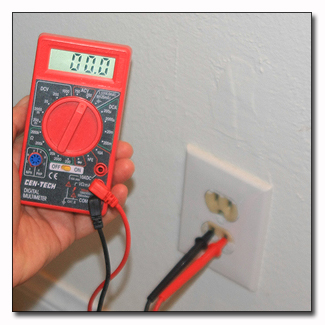
Using a volt meter, verify that the power has been turned off. If the meter indicates that there is electricity present, try turning off a different breaker or removing a different fuse. In the first part of this article, one way that was suggested to match up outlets with corresponding breakers is to use a night light. This is ONLY a safe practice for matching up the circuits and should not be used to check for electrical current before working with your household wiring.
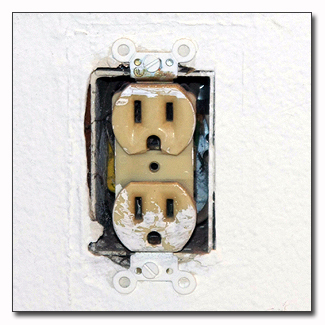
Remove the old receptacle plate.
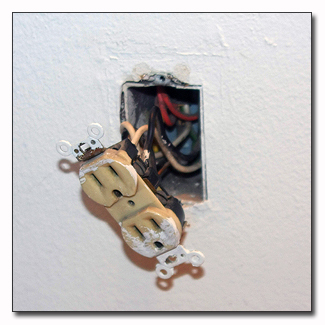
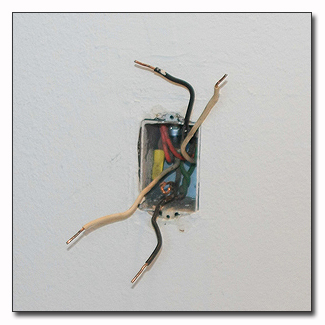
Remove the old receptacle from the workbox.
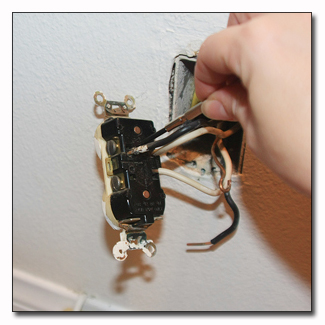
Disconnect the wiring from the old receptacle. You may need to unscrew the screws if you see the wires coiled around them. If the wires are inserted into a hole on the back, you may instead have to insert a screwdriver or similar object into the little slots above or below the wire insertion point. Tilt the screw driver up or down to release the wire.
If you have 2 wires in the box (plus a ground wire), then the receptacle is probably at the end of a series of receptacles. If you have 4 wires then the old receptacle is in the middle of a series of receptacles. You can see the receptacle pictured has 4 wires and is not the end of the chain. Be careful to keep the pairs together. The black and white wire on top is one pair and the ones on the bottom is another. Label them or position them to keep these pairs correct.
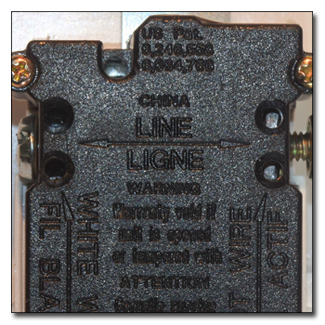
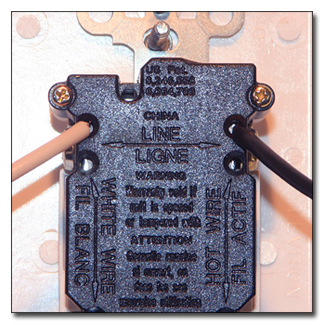
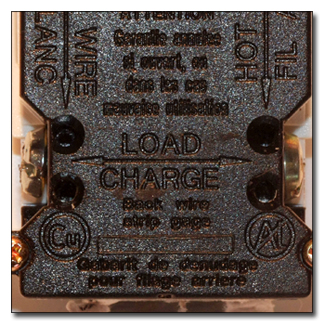
The black and white wires that you determined come from the breaker panel need to be attached to the two terminals on the new GFCI outlet that say “LINE”.
To connect the wires to the GFCI, push the wires into the holes and tighten the screw to the side. Make sure the screw is in the depressed position before inserting the wire. The white wire goes to the set of holes labeled the "White Wire" and the black goes to those labeled "Hot Wire". The wire can be placed either in the top or bottom holes.
If you have a second set of wires that continue on to other receptacles, and would like them to be controlled by the GFCI outlet, attach them to the "LOAD" terminals. If not, attach them to the second set of "LINE terminals (seen as empty holes in the picture above) and leave the "LOAD" terminals unconnected.
Take the one ground wire coming into the box and attach it to the grounding terminal on the GFCI outlet. This screw will always be green. Loop the wire so that it wraps around the screw in a clockwise direction. This will keep the wire from slipping off as you tighten the screw
Wrap electrical tape around the GFCI outlet so that it covers all of the screw heads on both sides. If your electrical box is too snug to fit the new receptacle, this step can be skipped. You must be sure, however, that the screws are not making contact with the electrical box itself.
Bend the wires in a zigzag pattern so that they easily fold into the workbox. Push the new outlet into place. Adjust the outlet so that it is perpendicular to the floor. Then tighten the two screws that hold it in position.
Install the new receptacle plate over the receptacle.
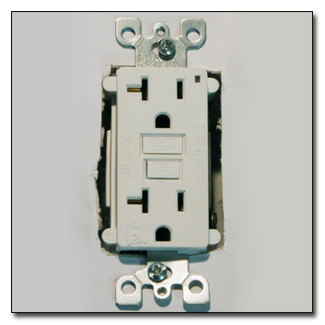
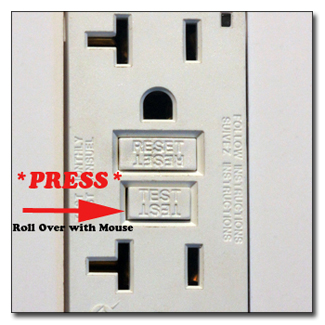
Switch the breaker back on (or reinstall the fuse). Test the new GFCI outlet to make sure the installation was successful by pressing the TEST button on the front of the outlet. You should hear a “click” as the breaker inside the outlet trips. Press the RESET button to reactivate the outlet.
If you installed the GFCI outlet in the middle of a series, you should also test receptacles further down the line using a circuit tester to confirm that you maintained the integrity of the series.
If at any point this seems confusing, or you encounter a setup that is different from explained, seek professional help with your install. Remember, above all else... SAFETY FIRST!
Special ThankS to hexedagain1, a certified electrician , on Saltwaterfish.com for his professional opinion and suggestions. Thanks hekedagain1!