Do you have a noisy overflow? Spouse threatening divorce? This easy-to-make addition will quiten your household and save your marriage. Let's build a standpipe!
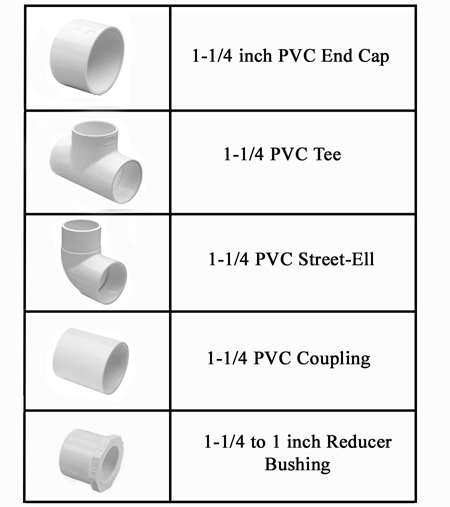
PVC pieces needed for the actual stand pipe..... ALL fittings are to be SLIP fittings! (not threaded... just in case someone didn't know what I meant by slip).
- 1-1/4" PVC End Cap
- 1-1/4" PVC Street-Ell
- 1-1/4" PVC Tee
- 1-1/4" PVC Pipe (the amount I got was the height of my tank + another foot to make connectors)
- 1-1/4" PVC Coupling
- 1-1/4 to 1" Reducer Bushing
- 1" PVC Pipe (a small piece... say half a foot)
- 1" Bulkhead (slip fitting)
Other materials Needed:
- Teflon Tape
- PVC Cement
- 1 AirlineValve
- 3/16 Rigid Airline Tubing (1 inch piece)
- Flexible Airline Tubing (about 6")
- Acetone (OPTIONAL: see below)
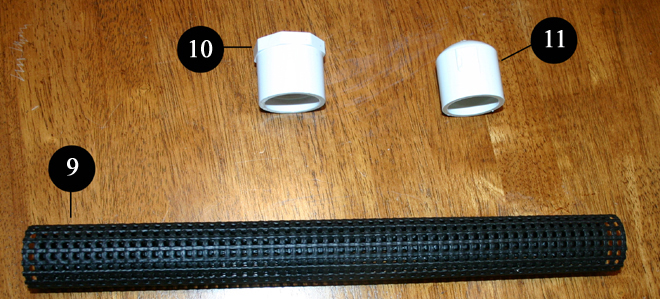
Optional PVC Fittings and other materials if using the 1" Strainer modification.
(9) 1" Intake Strainer
(10) 1-1/4 to 1" Reducer Bushing (same part as above... you'll just need two)
(11) 1" PVC End Cap
(12) Silicone Glue 1" PVC End Cap
Equipment needed.
(1) Dremel or a Drill with 3/16 drill bit (you need to drill a 3/16 hole in the end cap. So, the drill is easier
but a dremel will do if you are careful. BUT: if you decide to go with the "Strainer Modification"
you will need the Dremel to grind down the inside of the End cap and the Reducer Bushing.
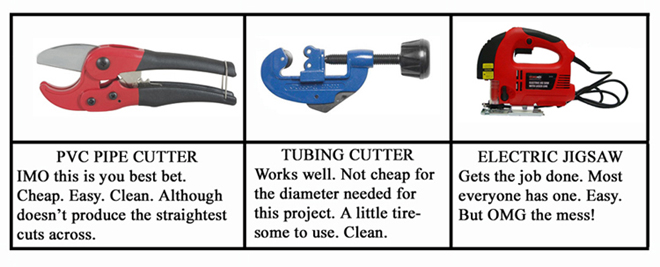
(2) Pipe Cutter: This can be done using....
... PVC Pipe Cutter (this is what I used)
... Tubing Cutter (be careful to get one that can handle the 1-1/4" tubing... and they can run kind of
expensive at that diameter.
... Plain ole Jig Saw (But OMG the mess!!! I tried this method one time and I never thought I
would be free of the PVC dust ever again! ... But it works.... it's just messy.
Okay... so now we have everything... we just need to build it.... the fun part!
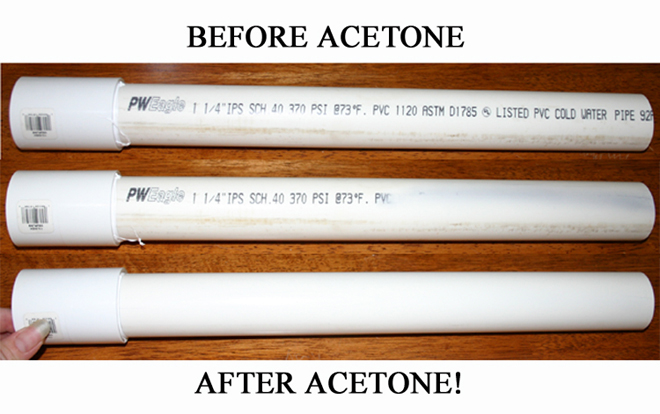
First of all I'm sure some have noticed that the print on the side of the PVC pipe is just ugly. Those of you who haven't noticed it, don't worry about it and skip this part. For those of you that it bugs this is where the optional acetone comes in. And what's so good about Acetone? See the pic below.
Ahhhhhh! Nice and clean.....
Now let's get started on construction.
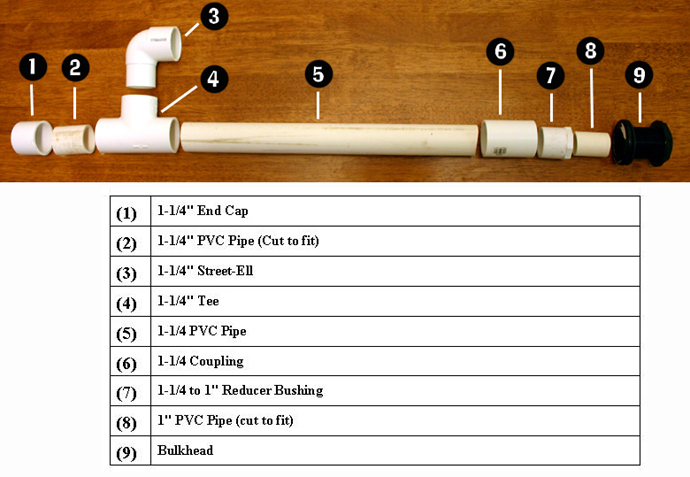
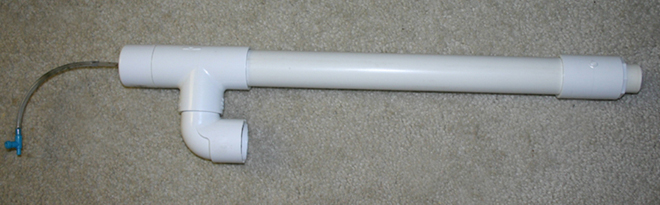
A pic says a thousand words in my opinion (Guess it doesn't surprise you that I would say that). Below I've laid out all the parts of the main part of the standpipe that simply have to be connected by one way or another to form the main body.
Before we start gluing things together we need to figure out how high this needs to be. Tap the pieces 1 through 7 together. It is best if you place teflon on the connectors to make sure you can dismantle them after. For me the height was very important because it would be fitting under the ledge of the tank. If yours is totally in the open, then it's not too important. And also note not to cut the main PVC pipe thinking this will be the end height when it is only temporarily placed together. When you actually pound the connectors together, it will make the whole standpipe shorter. But remember, you do not want to pound it too well before you are ready to make a permanent connection because you may never get it apart again.
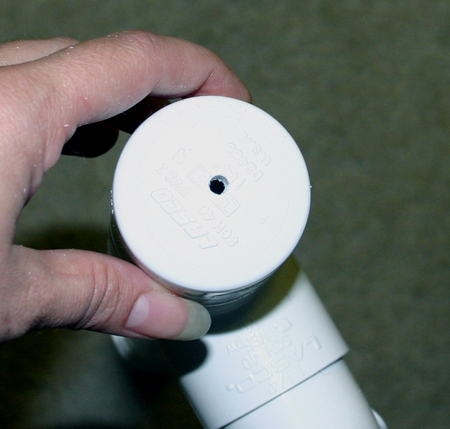
We also need to prepare the end cap (otherwise known as #1 in the above photo).
This is where if you have a drill with a 3/16 drill bit the job is very fast and precise. It can definitely be done with a dremel, it just takes a little more care while at the risk of not having the same precision.
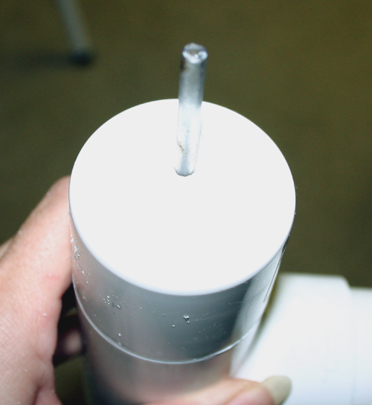
The hole is drilled to accommodate a piece of rigid airline tubing. There are many different ways to accomplish the purpose of this part which we will talk about later.
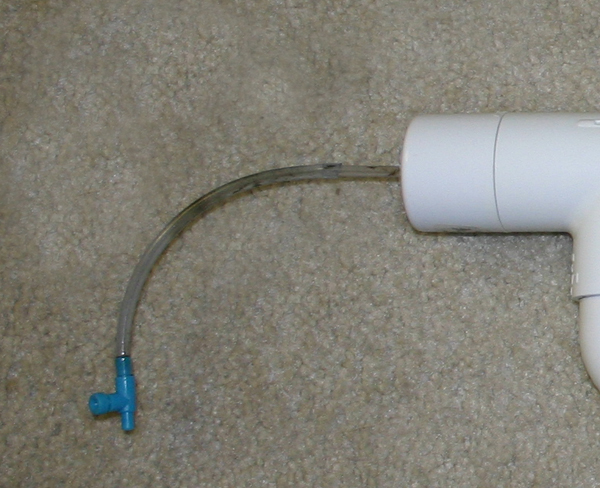
Then to the end of the rigid tubing you place the airline tubing and then the air valve regulator. Make the tubing long enough so that you can reach it in the future to adjust the valve. Just don't make it any longer than necessary because the longer it is the more the air flow will be restricted and may necessitate a second hole. (The flexible tubing in the pic is dirty so you can see it better  ) )
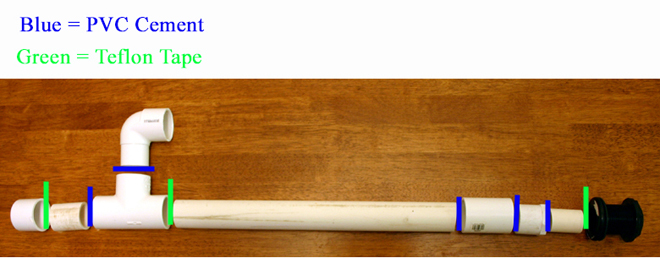
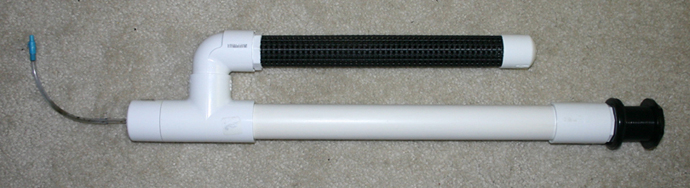
Okay, so you got the height figured out, the cap drilled, now let's glue or teflon the connections together. The whole thing is not just glued with PVC Cement... there are some parts you'll want to be removable so you just make those connections snug with teflon tape. The pic below should clearly illustrate which connections are glued and which are tefloned (is that a word ). I used a rubber mallet to tap the cemented connections.
All the connections made and sealed!! 
With the bulkhead......
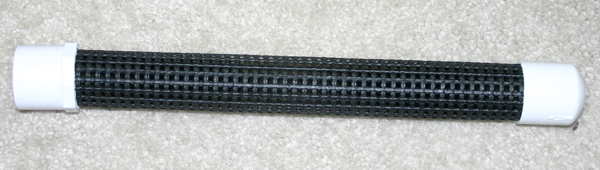
Voila.... all done.... unless you are going for the optional strainer. 
Well, the strainer I got was too big for the 1" fittings and too small for the 1-1/4" fittings. I'm not sure if other strainers out there of the same style would fit better or not and these length strainers can be a little difficult to come by. I only have one outlet for the sump flow and wanted the largest surface area just in case something flew over the back and got stuck on the strainer. But to fit the strainer in the PVC fittings I had to thin the inner walls of the fitting (this is where the Dremel came in). It was super easy and I just siliconed the strainer in place so that it would be only semi-permanent.
Ahhhh all done.... totally... unless you have to drill a hole in the tank to use this but that's another article....
How it looks standing in the tank.... overflow wall removed for visualization.
Enjoy your new peace and QUIET!
|