The following images all come from dropped eggs or
stillborn embryos:
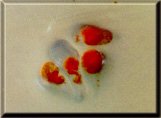
Eggs
Four eggs dropped
from female
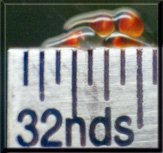
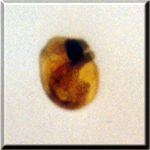
Eggs are cone shaped,
approx. 3/32" in length
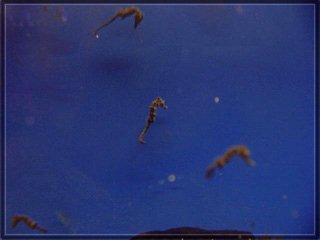
Birth Defects
Siamese twin taken
after specimen died
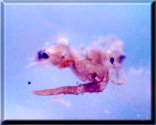
Development of an Embryo:
The egg is deposited in the male's pouch and fertilized:
Stage 1
At this point
the embryo is developing recognizable characteristics
such as a snout, eyes, body, and tail. However,
it still resembles an egg more than a seahorse:
Stage 2
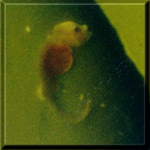
At stage 3, the features of a seahorse embryo become
far more recognizable. You can clearly see detailed
eyes, a developing (albeit short) snout, and the tail
is beginning to appear at the base of the body of the
embryo. You can also still clearly make out the
embryonic "sac" that is around the baby:
Stage 3
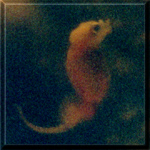
At stage 4 the seahorse has eyes that are easily distinguished,
and you can clearly see that the snout is beginning
to "cleave" or split to form the upper and lower half. Their internal organs are beginning to develop (as seen
in the many red spots), and the tail is more pronounced. The big "belly" they seem to have is pink and looks
like a part of their yolk sac:
Stage 4
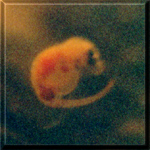
At stage 5 the seahorse has eyes that are readily
distinguished and very large, and you can clearly see
that the snout is beginning to fully "cleave" or split
to form the upper and lower half. They are significantly
bigger in size, and you can see their body, tail, and
even their dorsal fin when you look closely at them. Upon observation under a microscope or a magnifying
glass, you can also see other distinguishing features
such as their heart, gills, and air bladder:
Stage 5
At stage 6, their snouts are fully cleaved, but still
blunt and short. As you can see, their "triggers"
are developing, and their eyes are clear and more in
proportion. Under a microscope or magnifying glass,
you can see their fins, internal organs, and spinal
column. Their tail is long. As you can see,
they are still very pink, and "yolky" looking in their
bodies:
Stage 6
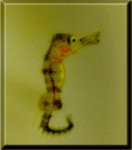
This is a picture of a fully developed baby Hippocampus
reidi as seen under the macro lens of our camera. As you can see, it is fully developed and has a snout
that is to length and cleaved, eyes that are more in
proportion to its head, etc. Under a magnifying
glass, you can see the internal organs such as the heart,
gills, and spinal column. The red line that runs
the length of the body vertically may be one of its
main arteries. These babies even have the beginnings
of a small crown developing when they are born, and
are also born with spines (ouch!) on their body. Structurally, they are a perfect replica of their adult
parents in a much smaller form.
Fully Developed
|


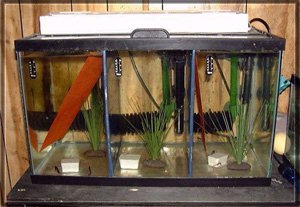 The simplest rearing tank is simply a plain square with
a heater, foam filter, and something for the fry to
hold onto. The above tank is actually a ten gallon with
dividers siliconed in to make three tanks. The orange
square seen inside on the left is "plastic canvas" available
at most craft stores and is a favorite to grab onto
at night. This type of system works well for most species.
As a rule of thumb if the seahorse can hitch (grab onto
something) right after birth they most likely can be
reared in this system.
The simplest rearing tank is simply a plain square with
a heater, foam filter, and something for the fry to
hold onto. The above tank is actually a ten gallon with
dividers siliconed in to make three tanks. The orange
square seen inside on the left is "plastic canvas" available
at most craft stores and is a favorite to grab onto
at night. This type of system works well for most species.
As a rule of thumb if the seahorse can hitch (grab onto
something) right after birth they most likely can be
reared in this system.
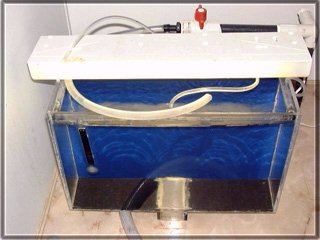 This system is more involved both in construction and
function. Focusing on Hippocampus reidi as a
reference species, this tank works very well. This system
consists of a 3.5 gallon rectangular tank equipped with
drip bars along the edges to create surface turbulence.
This prevents small fry from getting stuck on the sides
of the tank. This system also features a flow through
design, where as the water is pumped into the tank from
a wet/dry filter below and returned through a drain
in the bottom of the rearing tank. In addition to the
wet/dry filter it also utilizes an 8 watt UV sterilizer
as well as a 5 micron mechanical filter.
This system is more involved both in construction and
function. Focusing on Hippocampus reidi as a
reference species, this tank works very well. This system
consists of a 3.5 gallon rectangular tank equipped with
drip bars along the edges to create surface turbulence.
This prevents small fry from getting stuck on the sides
of the tank. This system also features a flow through
design, where as the water is pumped into the tank from
a wet/dry filter below and returned through a drain
in the bottom of the rearing tank. In addition to the
wet/dry filter it also utilizes an 8 watt UV sterilizer
as well as a 5 micron mechanical filter.